Part 2: Configuring IP, User Privileges, and the Second Data Disk

Objective of This Section
In this section, we further configure the freshly installed Debian VM. We assign a static IP address, establish proper user privileges, and permanently mount the second disk for Nextcloud data.
All packages will be updated to the latest state, and clean administrative privileges will be prepared.
At the end of this section:
- the VM is reachable via a static IP address
- a regular admin user with sudo privileges is configured
- the data disk is correctly mounted and persistently integrated
Step 1: Log In to the VM and Initial Overview
Prerequisites
- Debian 13 has been successfully installed
- The VM is running in Proxmox
- Access to the Proxmox web interface
- An SSH client (e.g., Tabby, Terminal, iTerm, PuTTY)
Hardware Recommendations
- The second virtual disk has already been added in Proxmox
- Size as required (e.g., 200 GB or more)
- The disk has not yet been configured inside Debian
VM Parameters (Example)
- Hostname:
nextcloud-vm - Static IP (example):
192.168.10.120 - Gateway:
192.168.10.1 - DNS: internal DNS + fallback
Required Credentials (Example)
- User:
ncadmin - Root password
- SSH access to the VM
Log In via SSH
Start the VM in Proxmox and determine the currently assigned IP address.
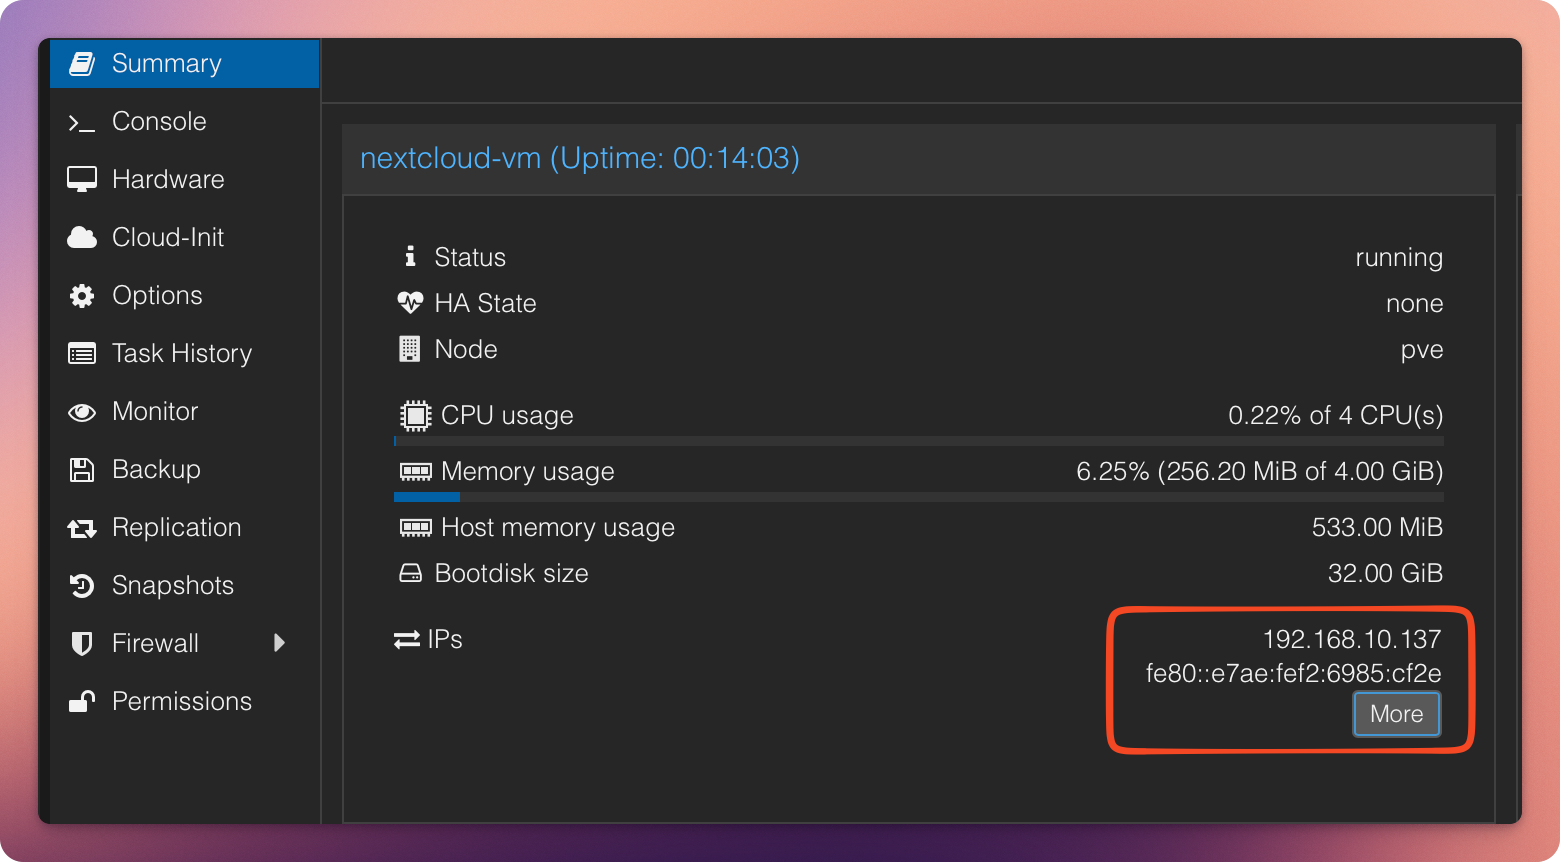
Then connect via SSH using the admin user ncadmin (or the user created in Part 1):
# Use your VM’s name and IP address
ssh ncadmin@192.168.10.120
On first connection, confirm the fingerprint with yes, then enter the password.

Step 2: Configure a Static IP Address
Objective
The VM must always be reachable under the same IP address. This is a prerequisite for DNS configuration, reverse proxy usage, and later for Nextcloud itself.
Edit Network Configuration
Open the file: /etc/network/interfaces:
sudo nano /etc/network/interfaces
Modify the primary interface as follows (the interface name may differ, often ens18):
# The primary network interface
allow-hotplug ens18
#iface ens18 inet dhcp
iface ens18 inet static
    address 192.168.10.120
    netmask 255.255.255.0
    gateway 192.168.10.1
    dns-nameservers 192.168.10.6 1.1.1.1
Adjust the IP addresses to match your network.
Save with CTRL+O, confirm with Enter, exit with CTRL+X.
To ensure that the dns-nameservers defined in the interfaces file are actually applied, the resolvconf package must be installed and enabled:
sudo apt install resolvconf
sudo systemctl enable resolvconf
sudo systemctl start resolvconf
Restart networking:
sudo systemctl restart networking
Important: Do not close the current terminal.
Instead, open a new terminal and test whether SSH login works again.
- Connection successful → configuration is correct
- Connection fails → use the existing terminal session to correct the network configuration
Step 3: Update the System and Root Access
Switch to Root Mode
su -
Update the System
apt update
apt full-upgrade
This updates both the package lists and all installed packages.
Optionally, the hostname can also be adjusted at this stage.
Step 4: Configure sudo Privileges
The regular user should be able to perform administrative tasks without remaining logged in as root.
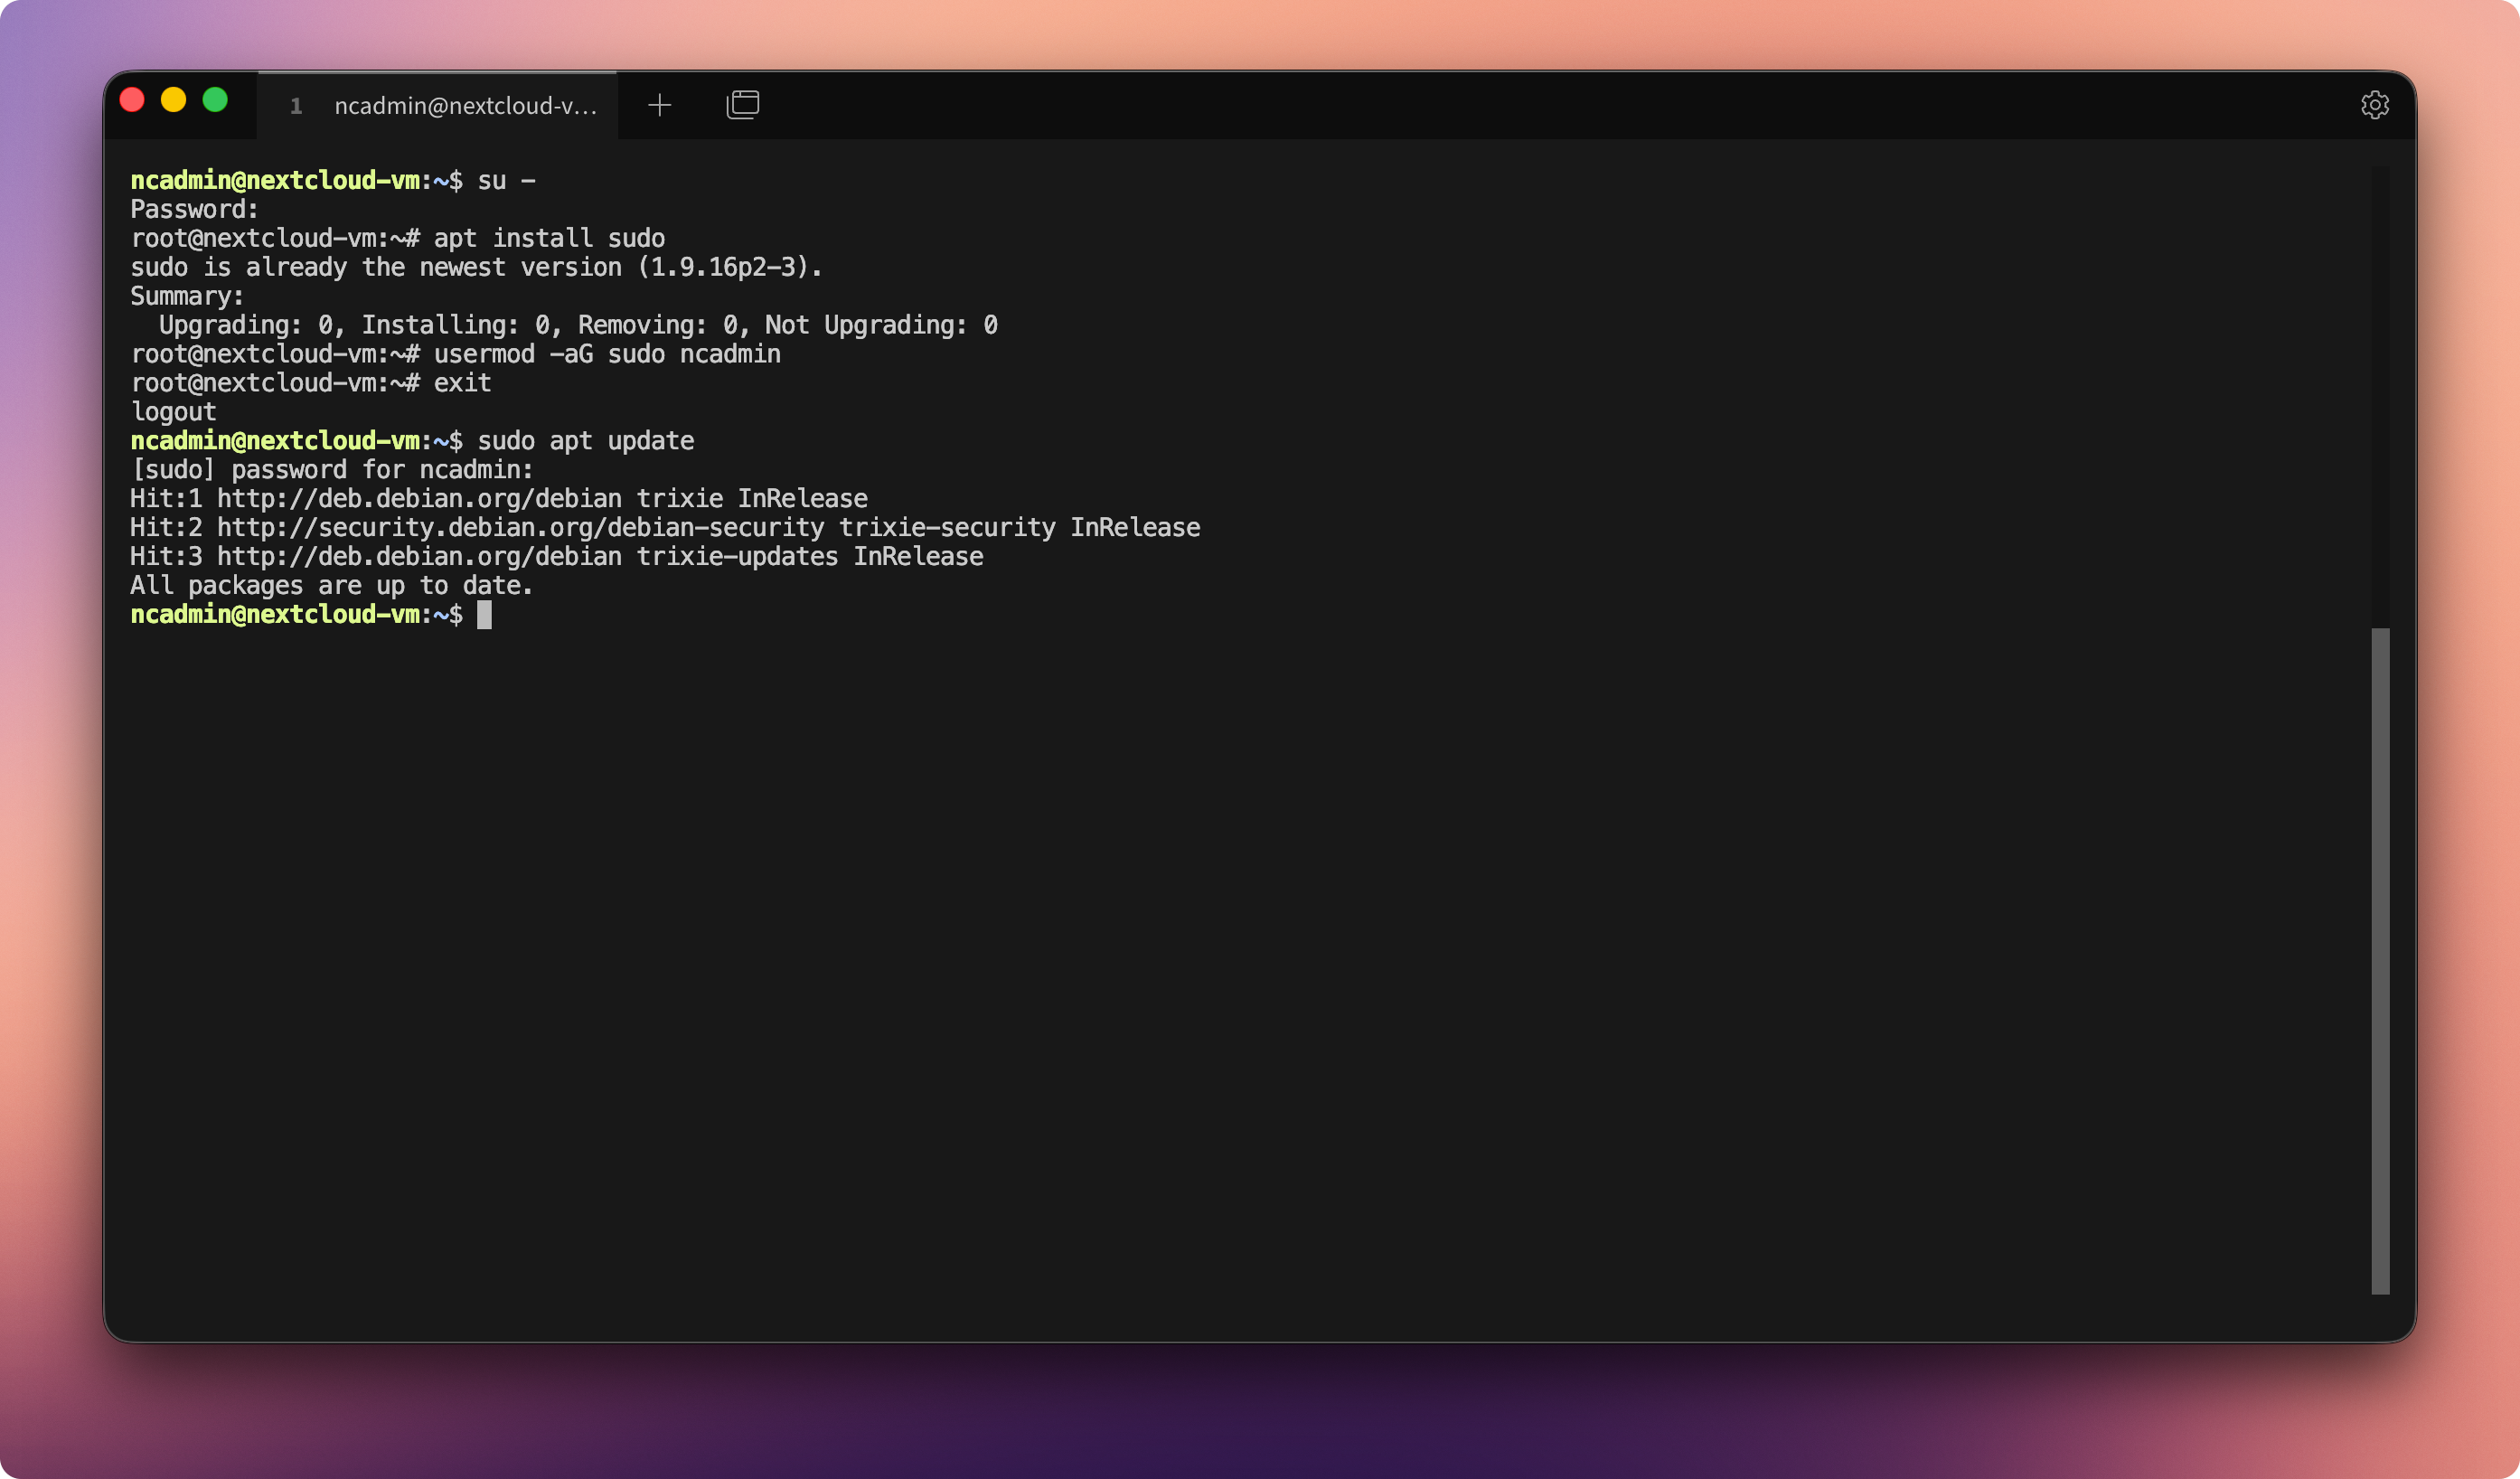
Install sudo
apt install sudo
Add User to sudo Group
usermod -aG sudo ncadmin
Afterward, log out from root. Future administrative commands can be executed using sudo.
Step 5: Prepare the Second Disk
The second virtual disk will be partitioned, formatted, and mounted as the data directory for Nextcloud.
⚠️ The mount point
/srv/cloud.zn80.netis only an example.
You may use any suitable path, such as/srv/nextcloud/data,/var/lib/nextcloud, or/home/ncadmin/cloud-data. Choose a structure that aligns with your system design and remains intuitive.
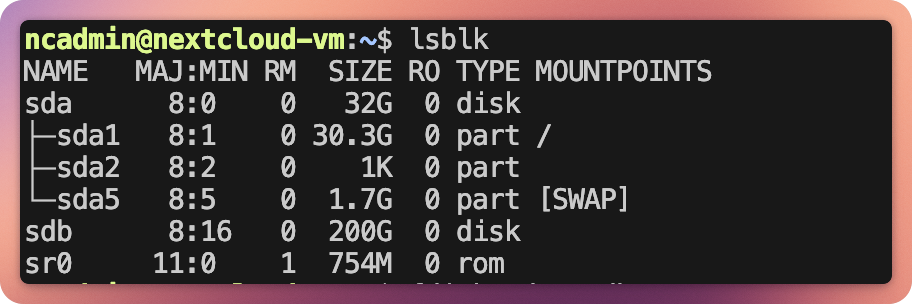
Overview of Available Drives
lsblk
The second disk is usually /dev/sdb.
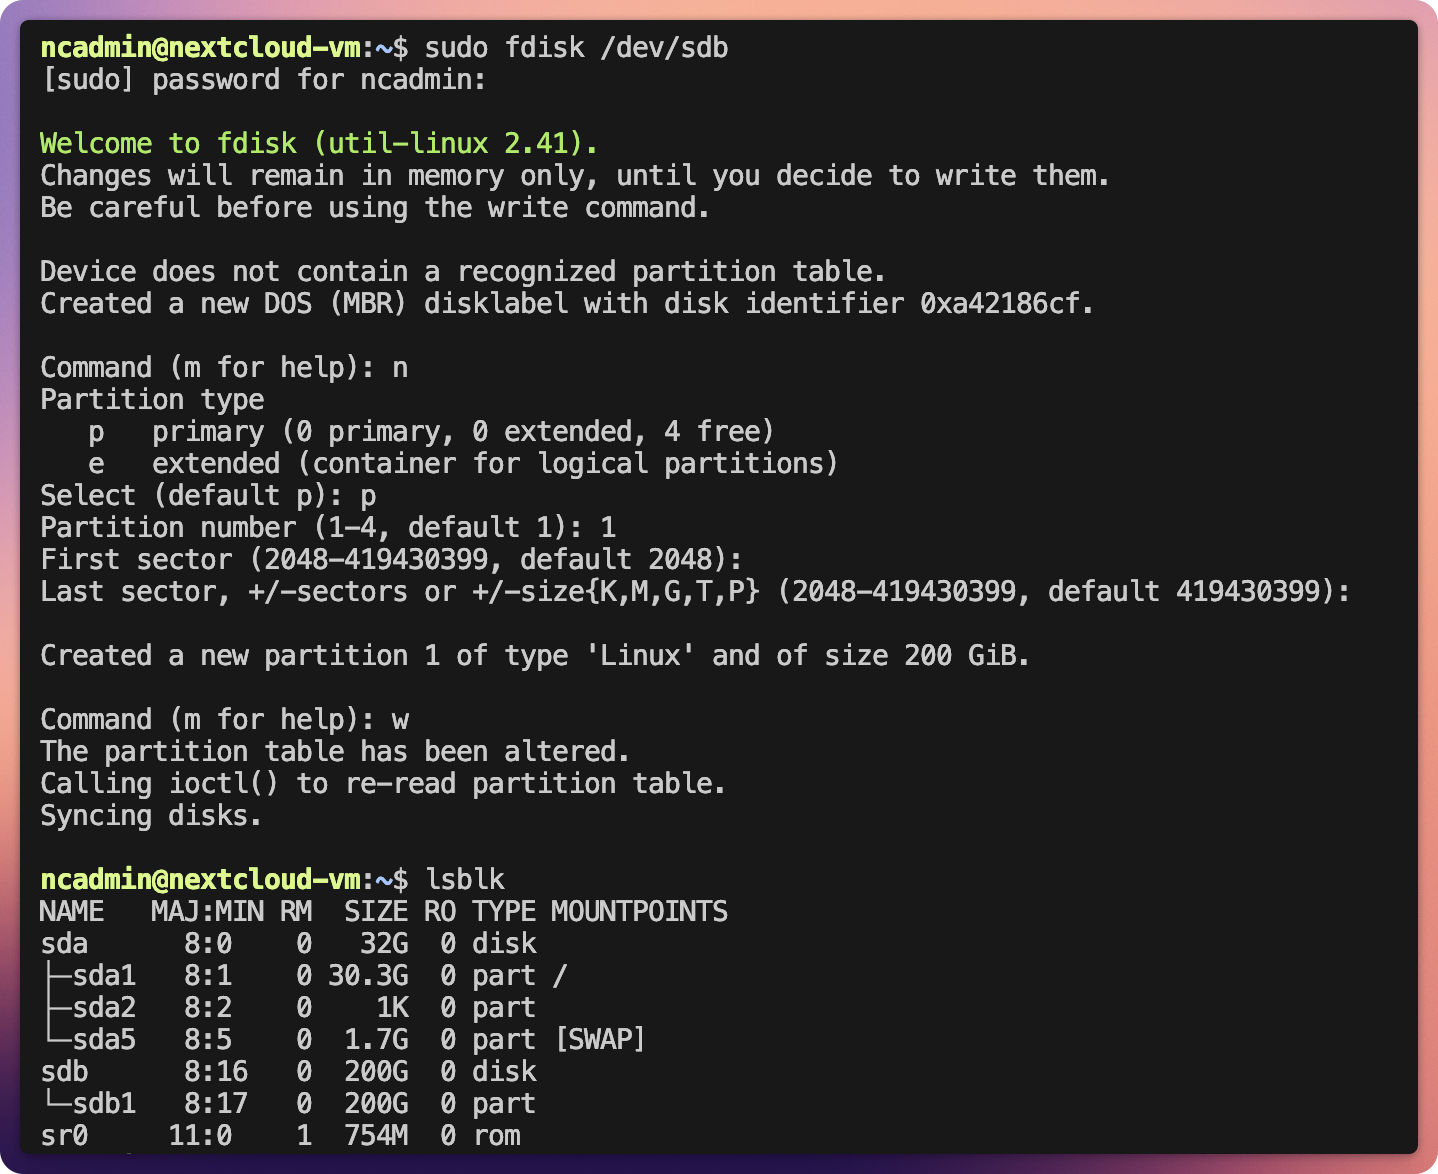
Create Partition
sudo fdisk /dev/sdb
Within fdisk, enter:
n(new)p(primary)1- Enter (start)
- Enter (end)
w(write)
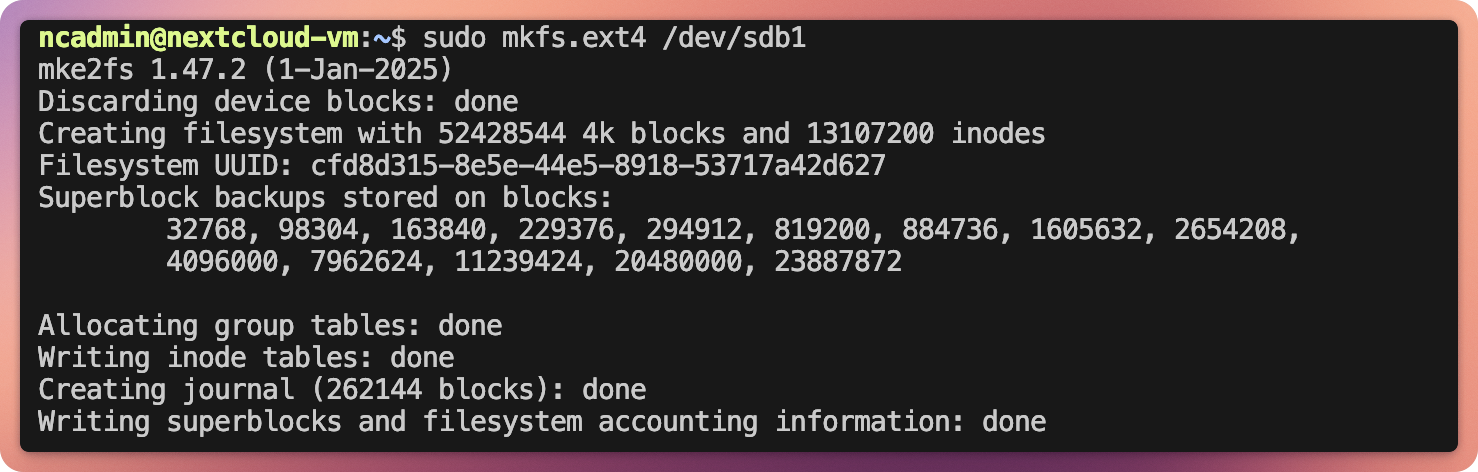
Create Filesystem
sudo mkfs.ext4 -L cloud.zn80.net /dev/sdb1
Create Mount Directory
sudo mkdir -p /srv/cloud.zn80.net
Step 6: Permanently Mount the Disk
Objective
The data disk should automatically mount at system startup.
Determine UUID
blkid
Note the UUID of /dev/sdb1.

The UUID is important because device names may change after reboot, whereas UUIDs remain constant.
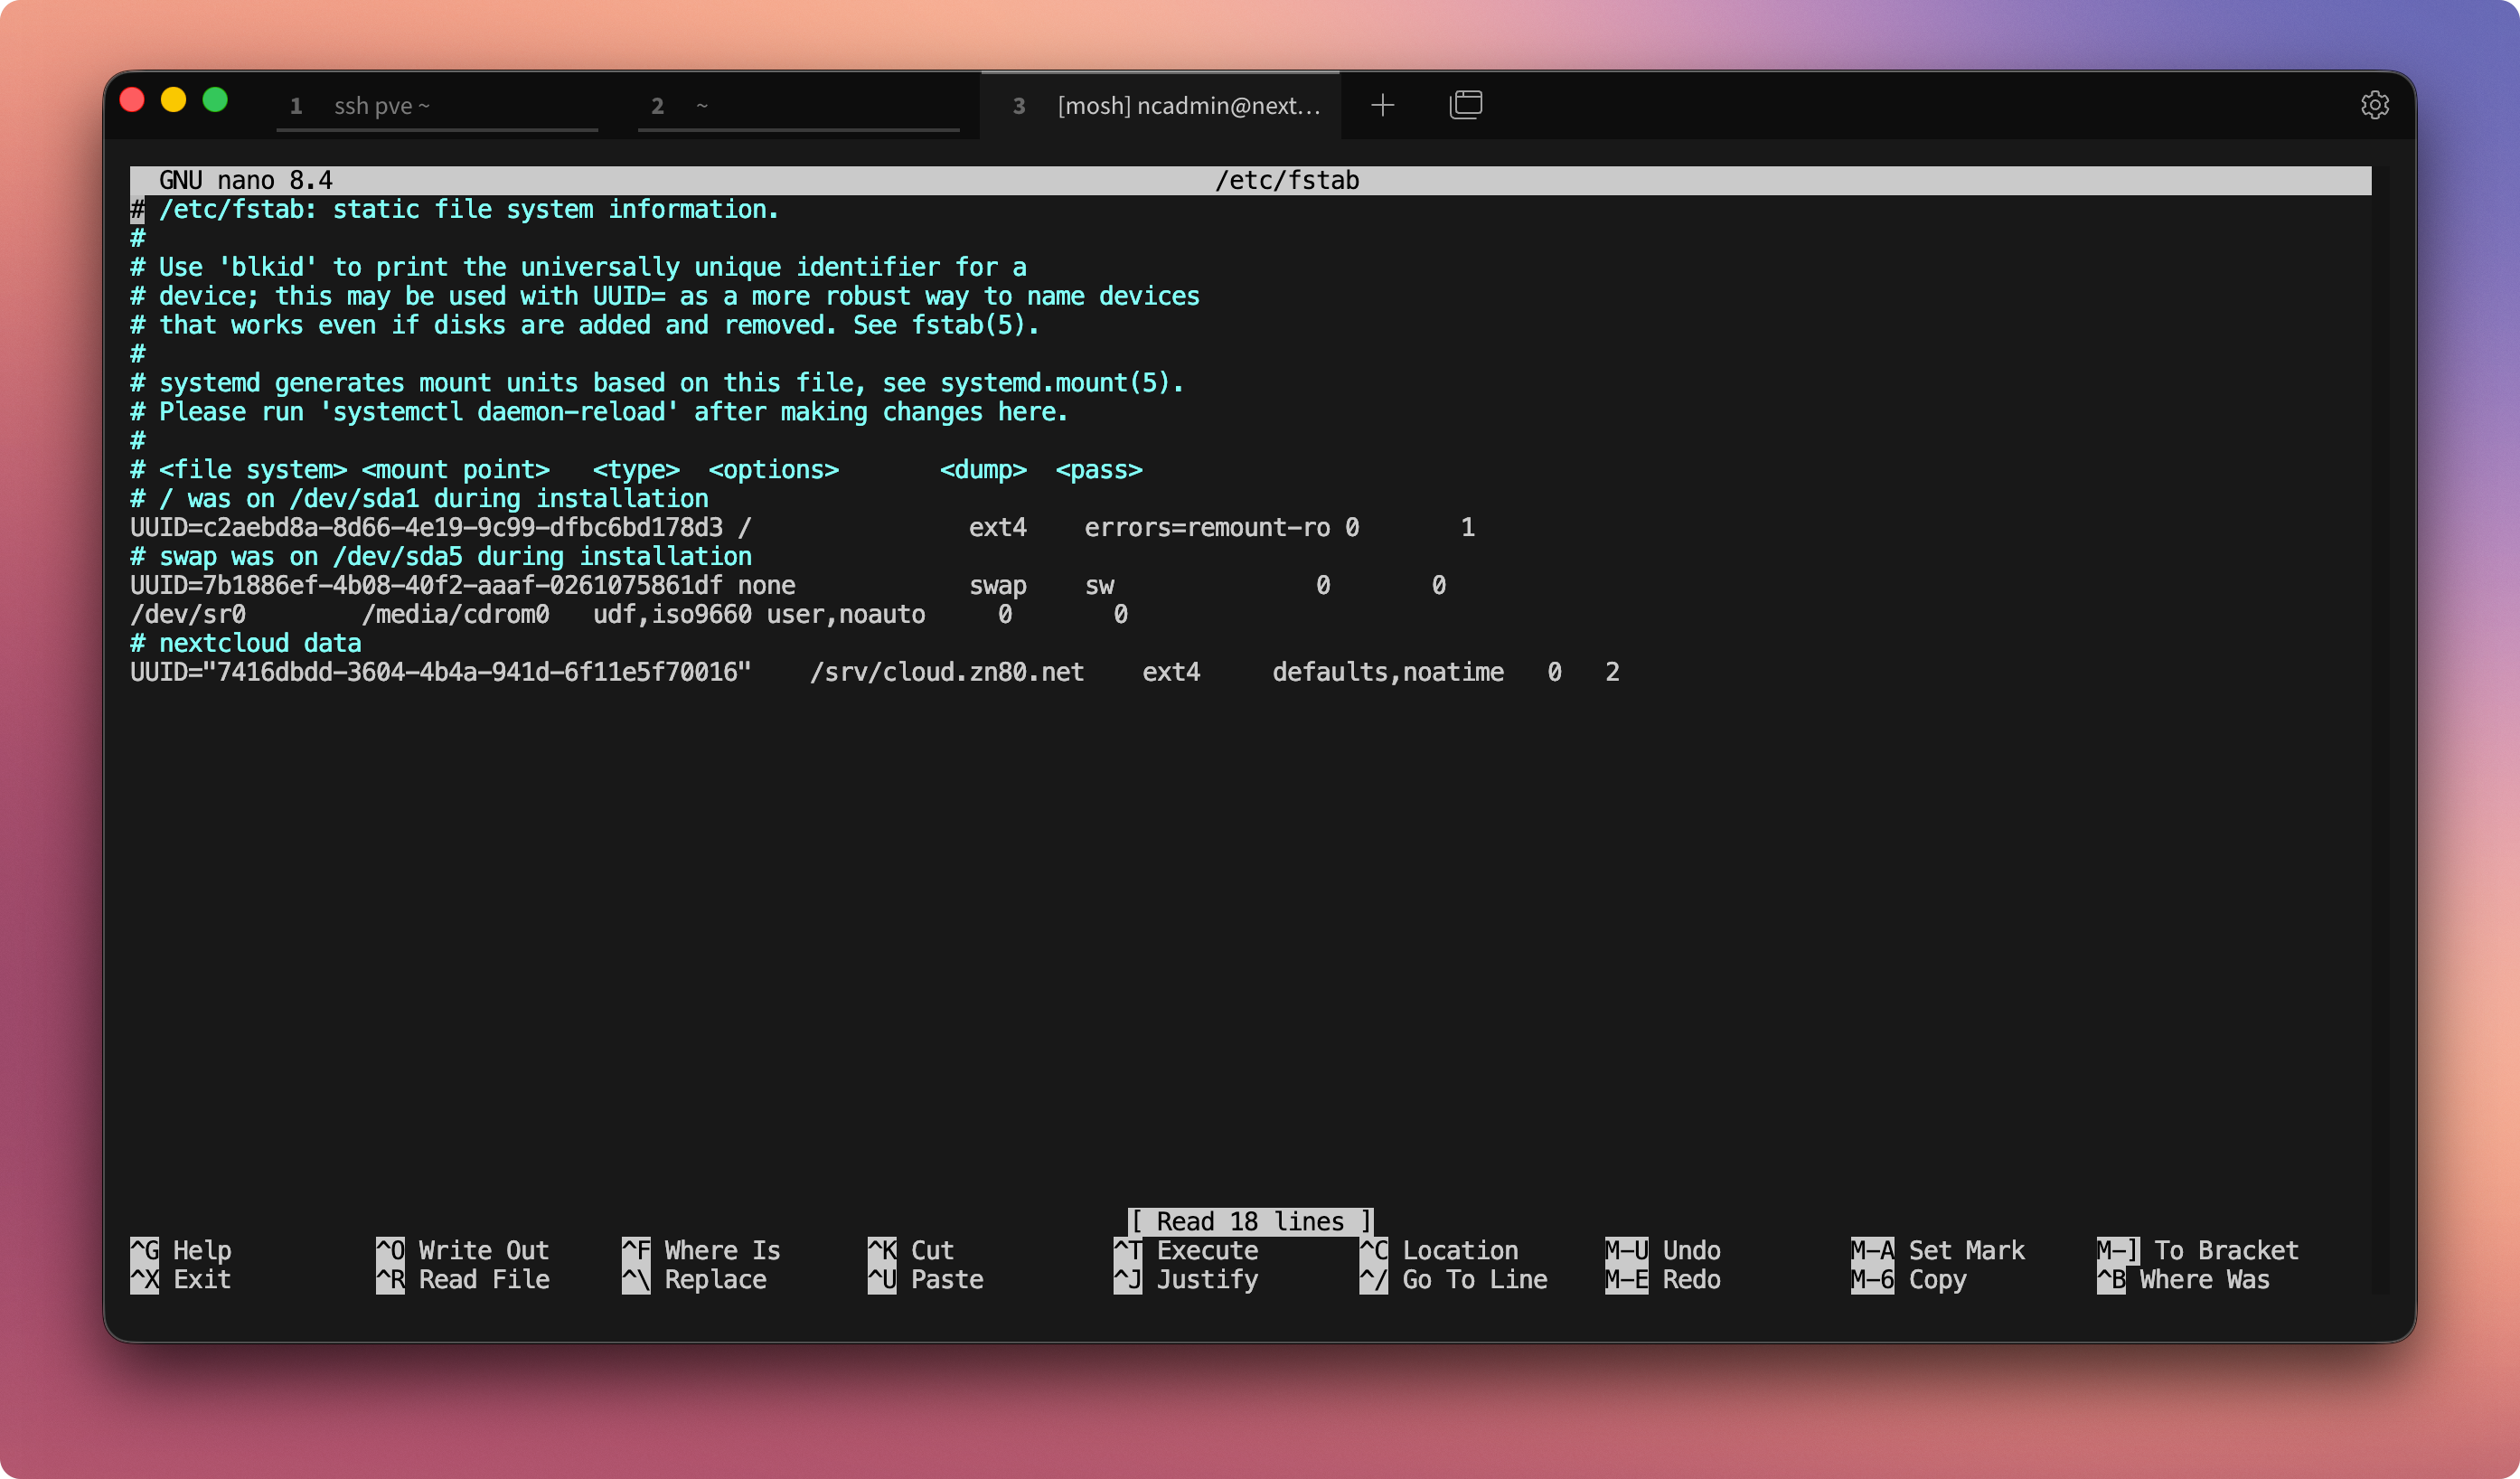
Edit /etc/fstab
sudo nano /etc/fstab
Add or modify the following line:
# nextcloud data
UUID=XXXXXXXX-XXXX-XXXX-XXXX-XXXXXXXXXXXX  /srv/cloud.zn80.net  ext4  defaults,noatime  0  2
Save and close the editor.
Test Mount
sudo mount -a
df -h
The disk should now be mounted under /srv/cloud.zn80.net.
The system is now fully prepared. The actual Nextcloud installation follows in:
Part 3: Downloading, Installing, and Configuring Nextcloud
Step 7: Resize the Disk (Optional)
⚠️ Important Notice Before Resizing
Before resizing the data disk, create a backup of the VM or critical data. A mistake (e.g., selecting the wrong partition) can result in complete data loss. The VM must be powered off and on again for the rescan and parted steps. Live resizing usingresize2fsworks only with ext4 and a mounted filesystem, but it is riskier and not always recommended. Proceed carefully and verify the partition before modifying it.
Objective
If additional storage is required later, the existing partition can be expanded without data loss.
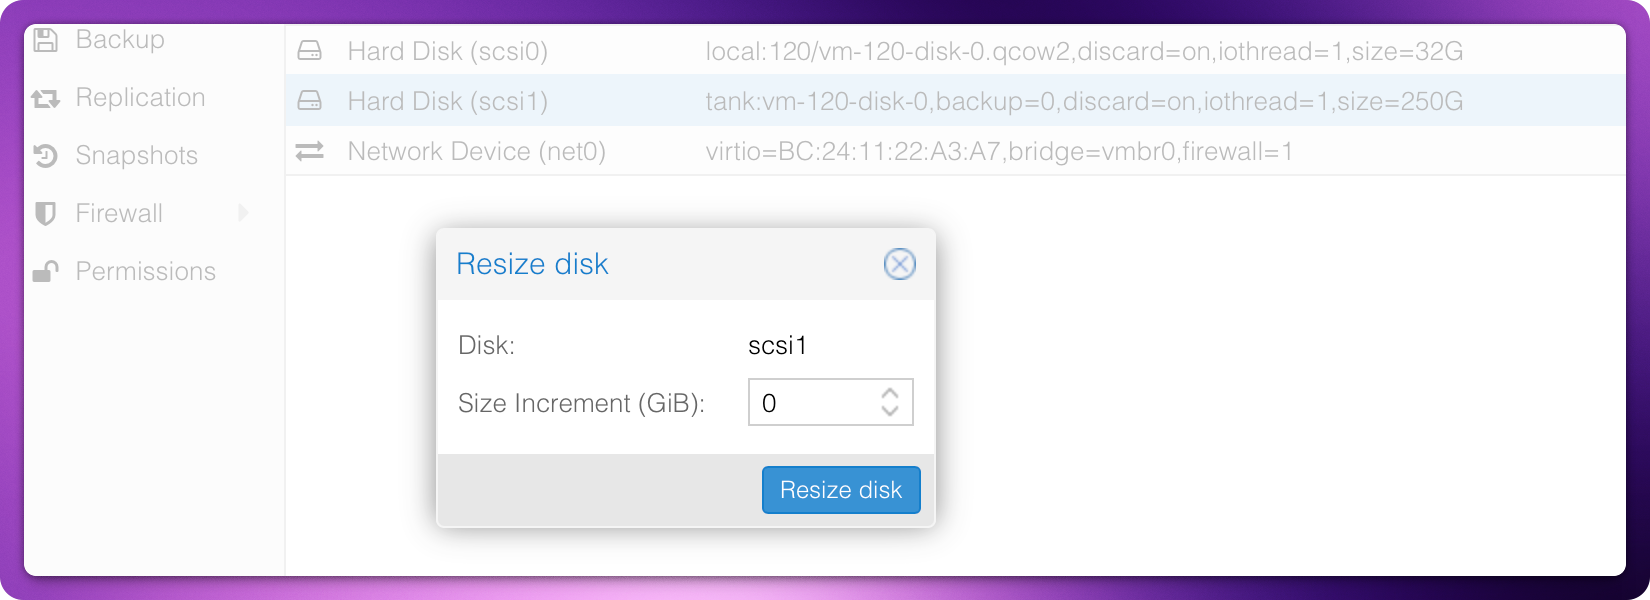
Resize Disk in Proxmox
- Select VM
- Disk → Resize
- Add desired capacity
Rescan in Debian
echo 1 > /sys/block/sdb/device/rescan
Reboot the VM if necessary.
Check Free Space
parted -s -a opt /dev/sdb "print free"
Resize Partition
parted -s -a opt /dev/sdb "resizepart 1 100%"
Resize Filesystem
e2fsck -f /dev/sdb1
resize2fs /dev/sdb1
Afterward, lsblk and df -h will reflect the new size.
Note: Differences in displayed sizes are due to GB vs. GiB.