Syncthing + FileBrowser Quantum
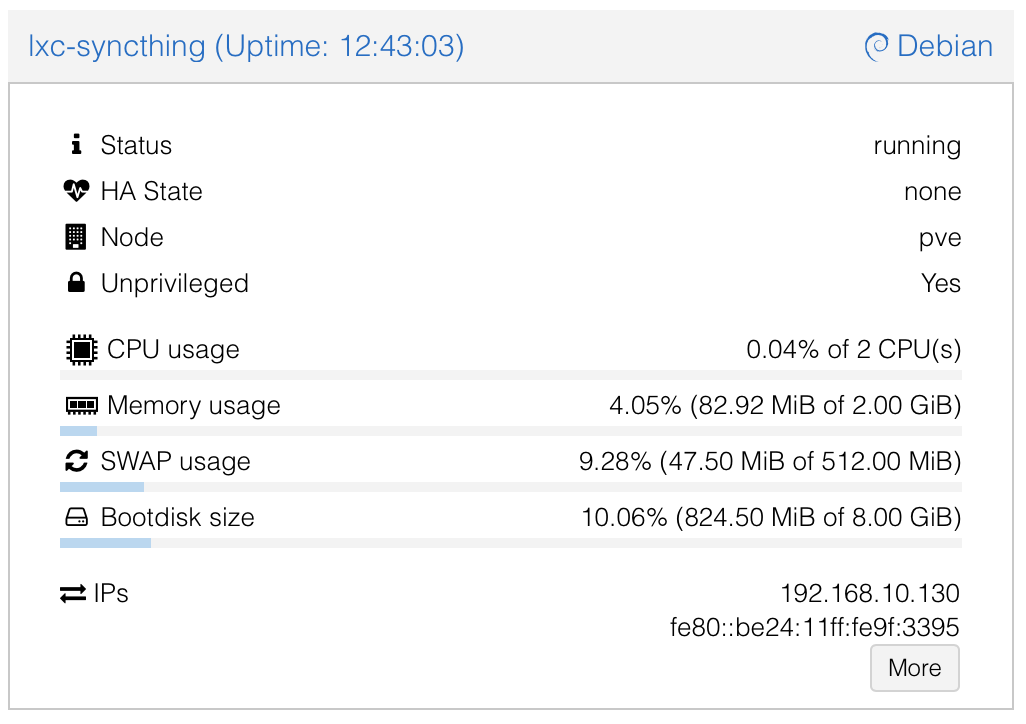
TheDer easiesteinfachste andund mostzuverlässigste reliableWeg wayist isdie toNutzung use thedes Proxmox VE Community Helper-ScriptScripts, whichdas automatesalles everythingautomatisiert (includinginkl. installingInstallation von Syncthing fromaus thedem Debian repo)Debian-Repository). ItEs createserstellt aneinen LXC withmit reasonablevernünftigen defaultsDefaults (~2GB2 GB RAM max, 2 cores—fineKerne for– largeausreichend transfers,für lowgroße usageTransfers, normally)normalerweise niedriger Verbrauch).
Option 1: RecommendedEmpfohlen – Use the Community Community-Script nutzen (Quickschnell & Easy)
einfach)
RunFühre thisdiesen singleeinen commandBefehl in theder Proxmox shellProxmox-Shell (nodeNode-Konsole) console):aus:
bash -c "$(curl -fsSL https://raw.githubusercontent.com/community-scripts/ProxmoxVE/main/ct/syncthing.sh)"
ItEssetserstelltupstandardmäßigaeinen privileged LXCby(einfacheredefaultBerechtigungen(simplerfürpermissionsgemountetefor mounted storage)Speicher).- Syncthing
installswirdandzunächstruns initially asals root installiert und gestartet (commonüblichwithbeiscripts)solchen Scripts),butaberwe'llwirswitchwechselnitestountenazudedicatedeinemuserdediziertenbelow.Benutzer. AfterNachcreation,deraccessErstellungtheerreichstSyncthingduwebdie Syncthing-Web-UIatunterhttp://<LXC-IP>:8384(setbeimGUIerstenauthZugriffonGUI-Authentifizierungfirst access)einrichten).
Option 2: ManualManuelles Setup
IfFalls youdu prefervolle fullKontrolle control:möchtest:
In
Proxmoxder Proxmox-UI:Create a newNeuen unprivileged LXC erstellen (Debian/BookwormBookworm-Templatetemplate recommended)empfohlen).- CPU: 2
coresKerne - RAM: 2048 MB (
oroderadjust)anpassen) - Storage:
8-8–20 GBroot diskRoot-Disk - Network:
StaticStatische IPoroder DHCP
- CPU: 2
- LXC
Startstarten,theKonsoleLXC,öffnenopenundconsole,Syncthingand install Syncthing:
apt update && apt upgrade -y
apt install syncthing -y
Post-Setup:
Nach Runder Einrichtung: Syncthing asals a Dedicateddedizierten Non-RootRoot-Benutzer Userbetreiben (Security Best Practice)
TheDas community scriptCommunity-Script (oroder manualdie install)manuelle oftenInstallation) startsstartet Syncthing asoft rootzunächst initially.als Switchroot. itWechsle tozu aeinem properrichtigen userBenutzer, toum avoidWarnungen warningszu andvermeiden reduceund risk.das Risiko zu senken.
StopRoot-Serviceandstoppendisableundthe root service:deaktivieren:
systemctl stop syncthing@root
systemctl disable syncthing@root
systemctl list-unit-files | grep syncthing # VerifyÜberprüfen, it'sdass disableddeaktiviert
CreateDediziertenaSystem-Benutzerdedicated system user:erstellen:
adduser --system --group --home /var/lib/syncthing --shell /usr/sbin/nologin syncthing
MigrateVorhandeneexistingKonfigurationconfigmigrieren (iffallsanyvonfromroot-Runroot run)vorhanden):
mkdir -p /var/lib/syncthing/.config
cp -a /root/.config/syncthing/* /var/lib/syncthing/.config/ 2>/dev/null || true
chown -R syncthing:syncthing /var/lib/syncthing
CreateDeinandDaten-Verzeichnissecureerstellenyourunddata directorysichern (e.g.,z.forB.yourfürshares)deine Shares):
mkdir /data
chown -R syncthing:syncthing /data
chmod -R 750 /data
Later,SpätermountmountestyourduProxmoxhierstoragedeinenhereProxmox-Speicher (e.g.,z.bind-mountB. Bind-Mount von/data/usera,/data/userb,/data/sharedfromvomhostHost viaProxmoxProxmox-UI > LXC > Resources > Add MP).
EnableAlsandneuerstartBenutzerasaktivierentheundnew user:starten:
systemctl enable syncthing@syncthing
systemctl start syncthing@syncthing
systemctl status syncthing@syncthing # CheckPrüfen, it'sob runningläuft
Integrating
Integration withmit Yourdeinen FileBrowserFileBrowser-Shares
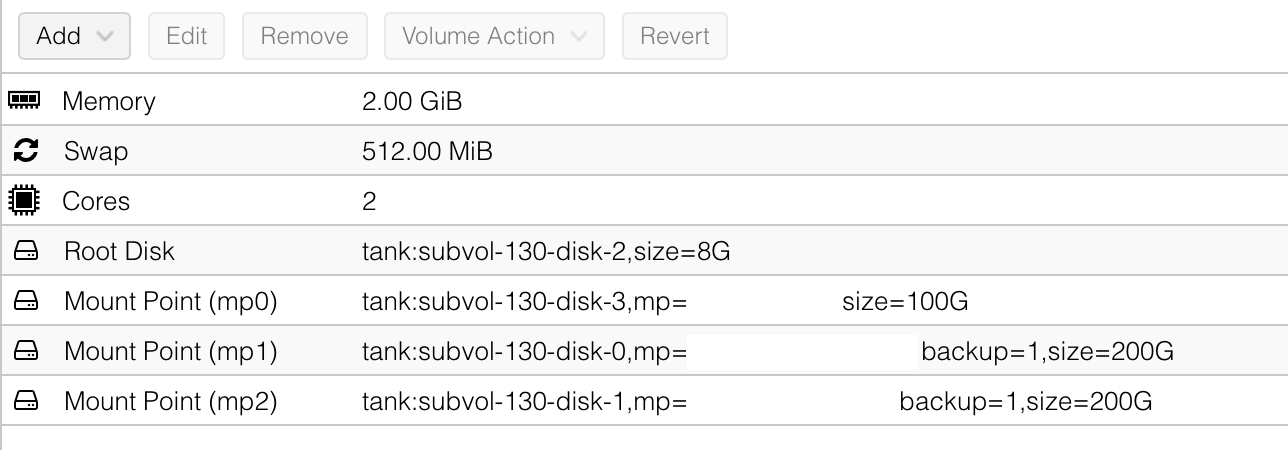
- In Proxmox:
AddBind-MountsbindfürmountsdeineforHost-Verzeichnisseyour host directories to thezum LXC hinzufügen (e.g.,z.mountB.hostHost/path/to/data/usera→ LXC/data/usera).SeeSieheaboveBildimage.oben. - In
Syncthingder Syncthing-UI:AddOrdnerfoldershinzufügen,pointingdietoauf/data/usera,/data/userb,/data/shared.zeigen.Set "Send Only" forFür privateuserUser-Ordnerfolders„SendifOnly“laptopssetzen,shouldfallsreceiveLaptopsbutnurnotempfangen,pushaberchangeskeineback.Änderungen zurückpushen sollen.Full bi-directional forFür/data/shared.volle bidirektionale Synchronisation.
Konfigurationsdatei
Config File forfür FileBrowser Quantum
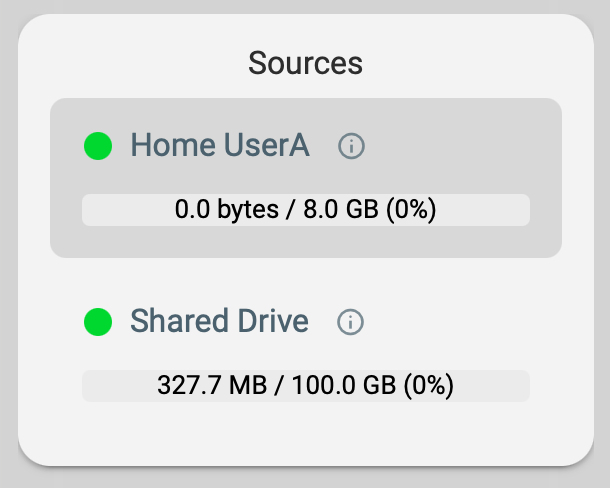
TheDie onlyeinzige wayMöglichkeit, to havedass FileBrowser Quantum showdie correctkorrekten usedgenutzten andund remainingverbleibenden sizeGrößen ofeines aMount-Points mountanzeigt, pointist, isjeden toMount-Point map each mount point as aals separate sourceSource in theder configConfig-Datei file.zu Thismappen. isSo howsieht minemeine looksaktuelle rightKonfiguration nowaus which– mapssie eachmappt mountjeden pointMount-Point asals aSource, sourceund anddie theBenutzer usersbekommen willnur beZugriff grantedauf accessihren toeigenen heUser-Source sharedund sourceden andShared-Source. theirDadurch usersbleiben sourcedie only.Dinge Thisgetrennt, wayaber wees keepgibt thingseinen separatezentralen fromShare eachfür otheralle but have one central share for all the users of the system.System-Benutzer.
# FileBrowserQuantum Config File /syncthing-data/fbq-config.yaml
server:
  port: 8080
  externalUrl: "https://files.example.com"
  database: /syncthing-data/database.db
  sources:
  - path: /syncthing-data/home/usera
    name: Home UserA
    config:
      defaultEnabled: false
  - path: /syncthing-data/home/userb
    name: Home UserB
    config:
      defaultEnabled: false
  - path: /syncthing-data/shared
    name: Shared Drive
    config:
      defaultEnabled: true
  logging:
  - levels: info|warning|error
    apiLevels: info|warning|error
    output: stdout
    noColors: false
    utc: false
frontend:
  name: FileBrowser Quantum
auth:
  adminUsername: admin
userDefaults:
  permissions:
    api: false
    admin: false
    modify: false
    share: false
    realtime: false
    delete: false
    create: false
    download: false
ByDurch settingdiese itEinrichtung upkannst thisdu way,die you can then assign the sourcesSources in FilebrowserFileBrowser Quantum toden theBenutzern userzuweisen
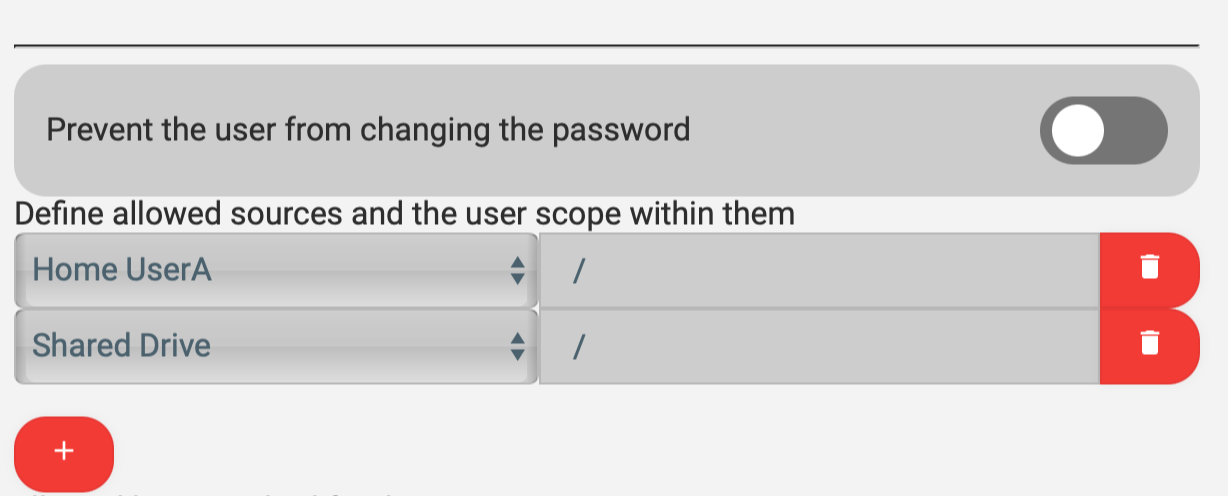
TheySie willerscheinen thendann appearauf ondem the Home Home-Screen onlinks themit leftden sidekorrekten with their correct usage values.Nutzungs-Werten.
Hub-First Setup Reminder
Erinnerung
ConfigureOrdnerfolderskonfigurierenandundgenerate deviceDevice-IDsonzuersttheaufProxmoxdemhubProxmox-Hubfirst.generieren.Then installDann Syncthingonaufyourdeinenlaptop(Laptop(s),addinstallieren,thediehub'sHub-Device-IDdevicehinzufügenID,undand connectverbinden (hubHubasalsintroducerIntroducerforfüreasyeinfacheshub-Hub-and-spoke)Spoke-Setup).